Understanding Planning Permission Essentials
When considering a house extension in the UK, it’s crucial to first understand the essentials of planning permission. Planning permission is an official approval granted by your local planning authority that allows you to carry out building works or changes to the use of land or buildings. For many homeowners, this process can seem daunting, but knowing the basics will help you navigate it more confidently. Planning permission exists to ensure any development or extension is appropriate for its setting, respects neighbouring properties, and complies with local development plans.
Why Is Planning Permission Required?
House extensions often require planning permission because they may affect the external appearance of your property, the privacy and access of neighbours, or even the broader character of your area. Failing to secure proper permission can result in enforcement action, which could mean reversing any unauthorised work at considerable cost. Therefore, understanding when you need planning permission is essential before starting any project.
Permitted Development Rights vs Full Planning Applications
Not all house extensions require full planning permission thanks to what are known as ‘permitted development rights’. These are allowances that let homeowners undertake certain types of work without needing to submit a full planning application. However, these rights have limitations and conditions, especially in designated areas like conservation zones or if your property is a listed building.
| Aspect | Permitted Development Rights | Full Planning Application |
|---|---|---|
| Scope of Works Allowed | Minor extensions and alterations within set size limits | Larger or more complex projects exceeding PD limits |
| Approval Needed | No formal application (but check for exceptions) | Formal submission required to Local Authority |
| Timeframe | Immediate if compliant | Typically 8 weeks for decision |
Key Takeaway
If your planned extension falls outside permitted development rules—such as extending beyond certain dimensions or altering a listed building—you’ll need to submit a full planning application. Always consult with your local planning authority early in your project to clarify which permissions apply to your specific situation.
2. Preparing Your Extension Plans
Before you submit a planning application for your house extension, it’s crucial to ensure your plans are not only well thought out but also compliant with local regulations. The preparation stage sets the foundation for a smooth application process and increases your chances of approval.
Guidance on Drawing Up Compliant Plans
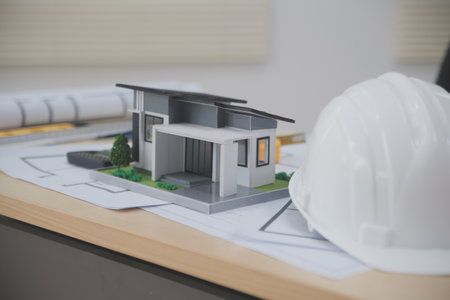
Start by accurately measuring your existing property and sketching the proposed extension. Your drawings should include floor plans, elevations, site location plans, and block plans. These documents must be to scale and clearly show how the extension relates to neighbouring properties and boundaries. Consider using architectural software or hiring a draughtsman if you are unfamiliar with technical drawings.
Key Documents for Submission
| Document | Description |
|---|---|
| Site Location Plan | Shows the property in relation to surrounding area (usually at 1:1250 or 1:2500 scale) |
| Block Plan | Details the development within the boundary (usually at 1:500 scale) |
| Existing & Proposed Floor Plans | Shows layout before and after extension |
| Elevations | Visualises external appearance from all sides |
Considering Local Regulations
The UK has specific rules regarding height, footprint, proximity to boundaries, and use of materials. Check your local council’s planning portal for supplementary guidance such as conservation area restrictions or listed building requirements. Failure to comply could result in delays or refusal.
Seeking Professional Advice
If you’re unsure about any aspect of design or regulation, consult an architect or planning consultant. Their expertise can help interpret complex rules and optimise your design for compliance. Fees vary depending on complexity, but professional input often saves time and money in the long run.
Engaging Early With Your Local Planning Authority
Contact your local planning office early in the process. Most councils offer pre-application advice, where you can discuss your ideas informally with a planning officer. This engagement helps identify potential issues and clarifies documentation requirements before formal submission.
Summary Checklist for Preparing Your Extension Plans:
- Draw clear, scaled plans showing both existing and proposed layouts
- Review relevant local policies and permitted development rights
- Seek professional advice if needed
- Liaise with your local planning authority for pre-application guidance
- Assemble all required documents for submission
By investing time in careful preparation and early engagement, you’ll be better positioned to navigate the planning permission process smoothly.

3. Submitting Your Application
Once you have prepared your plans and supporting documents, the next crucial step is to submit your planning application. In the UK, the most straightforward way to do this is via the Planning Portal, which is the government’s official online service for planning applications. Below is a step-by-step guide to ensure your submission is accurate and complete.
Step 1: Gather Required Documentation
You’ll need several key documents before making your submission. The most common include:
| Document Type | Description |
|---|---|
| Application Form | Completed planning application form, specific to your local authority. |
| Site Location Plan | A scaled map showing the site and its surroundings (usually at 1:1250 or 1:2500 scale). |
| Block Plan | A detailed plan of your property and the proposed extension (typically at 1:500 scale). |
| Existing and Proposed Elevations | Drawings showing how your house looks now and how it will look after the extension. |
| Design & Access Statement | An explanation of the design principles behind your proposal, required for some projects. |
Step 2: Calculate and Pay Fees
The fee for a householder planning application in England is generally £258 (as of 2024), though this may vary in Scotland, Wales, or Northern Ireland. Check with your local authority or use the Planning Portal’s fee calculator for accuracy. Payment can usually be made online during the submission process.
Step 3: Complete the Online Application on the Planning Portal
- Create an account on the Planning Portal.
- Select ‘Start a new application’ and choose the correct type (typically ‘Householder application’ for extensions).
- Upload all required documents in PDF format.
- Fill in all relevant details about your project, ensuring consistency with your submitted plans.
Checklist Before Submission
- Double-check that all plans are clearly labelled and drawn to scale.
- Ensure all supporting statements are included if required by your local council.
- Pay the application fee via the secure payment system.
After Submission
You’ll receive confirmation from the Planning Portal and your local authority will acknowledge receipt. From here, they will begin assessing your application, which typically takes around eight weeks. You can track progress through your Planning Portal account and respond promptly if further information is requested.
4. Understanding Neighbour Consultation and Objections
When you apply for planning permission for a house extension in the UK, public consultation is an integral part of the process. Local authorities are required to inform your immediate neighbours about your proposed development, typically by sending out notification letters or displaying site notices. This stage provides your neighbours with the opportunity to review your plans and raise any concerns or objections they may have.
The Public Consultation Process Explained
Once your application is validated, the consultation period usually lasts for 21 days. During this time, neighbours can submit their comments—either in support or objection—to the local planning authority. The table below outlines how this process typically unfolds:
| Step | Description |
|---|---|
| Notification | Neighbours receive official notice of your planning application. |
| Review Period | Neighbours have 21 days to review plans and provide feedback. |
| Objection Submission | Comments or objections must be submitted in writing to the council. |
| Council Assessment | The local authority considers all responses as part of their decision-making process. |
Handling Possible Objections from Neighbours
Common grounds for objection include loss of privacy, overshadowing, impact on local character, or increased noise. It’s important to remember that not all objections will affect the outcome; only those based on material planning considerations will be taken into account by the council.
Tips for Maintaining Good Relations in Your Community
- Communicate Early: Speak to your neighbours before submitting your application. Explaining your plans can help alleviate concerns and demonstrate consideration.
- Provide Clear Information: Share drawings or sketches so neighbours understand exactly what is proposed.
- Be Open to Feedback: If concerns are raised, consider reasonable amendments to your design that could reduce negative impacts.
- Stay Respectful: Even if you disagree with an objection, respond politely and professionally.
- Keep Records: Document any agreements or discussions for future reference.
Summary Table: Best Practices for Good Neighbourly Relations
| Action | Benefit |
|---|---|
| Early Communication | Reduces likelihood of formal objections |
| Transparency with Plans | Builds trust and understanding |
| Willingness to Amend Design | Makes approval more likely and preserves goodwill |
| Cordial Engagement | Keeps community relations positive regardless of outcome |
| Documentation of Discussions | Avoids misunderstandings later on |
Navigating neighbour consultations effectively not only increases your chances of a smooth planning process but also helps maintain strong community ties—an essential aspect of home improvement projects in the UK.
5. Navigating the Decision Process
After you have submitted your planning application for a house extension in the UK, it is essential to understand what comes next. Here’s what you can expect during the decision process, including typical timelines, how decisions are made, and what steps to take if you encounter issues.
What Happens After Submission?
Once your application is lodged with your local planning authority (LPA), they will acknowledge receipt and begin a formal review. Your application will be made available to the public for comments, and neighbours may be notified as part of the consultation process. The LPA will also consult other relevant departments, such as highways or conservation officers, if necessary.
Typical Timelines
| Application Type | Decision Timeline |
|---|---|
| Householder Planning Application | 8 weeks from validation date |
| Larger or More Complex Applications | Up to 13 weeks |
| EIA (Environmental Impact Assessment) Applications | 16 weeks or more |
Key Stages in the Decision Process:
- Validation: The LPA checks all required documents and information are present.
- Consultation: Public notices and consultations with stakeholders are carried out.
- Assessment: Planning officers assess your proposal against local and national policies.
- Recommendation: Officers make a recommendation to either approve or refuse.
- Decision: The final decision is made by an officer under delegated powers or by a planning committee.
How Are Decisions Made?
The planning department assesses your extension plans based on several criteria: compliance with local development plans, impact on neighbours (such as loss of light or privacy), overall design and scale, and any objections raised during consultation. Environmental considerations and precedent set by similar applications are also taken into account.
If Issues Arise: Following Up With the Planning Department
- If your application is delayed beyond the standard timeframe, you can contact your case officer for updates.
- If further information is requested, respond promptly to avoid additional delays.
- If you receive objections or concerns from neighbours, consider addressing them through amendments before a decision is made.
- If refused, you have the right to appeal; details of this process will be provided in the refusal notice.
Navigating this stage requires patience and proactive communication. Keeping detailed records of all correspondence with the LPA can help resolve misunderstandings swiftly. By understanding each step of the process and knowing when to follow up, you can improve your chances of a positive outcome for your house extension project.
6. Responding to Approval or Refusal
Once your planning permission application for a house extension has been reviewed, the local authority will issue a decision notice. Understanding what to do next—whether you receive approval or refusal—is crucial for keeping your project on track.
If Your Application is Approved
Congratulations! However, approval often comes with specific conditions attached. These must be met before and during construction to ensure compliance with local regulations.
Common Conditions You May Need to Satisfy
| Condition Type | Description | Action Required |
|---|---|---|
| Time Limit | You usually have three years to commence work from the date of approval. | Start construction within the specified timeframe. |
| Materials | Use of materials must match or complement existing structures. | Select materials as stipulated in approval documents. |
| Building Regulations | Separate from planning permission; compliance is still required. | Submit building control application before starting works. |
| Landscaping/Boundaries | You may need to submit further details regarding landscaping or boundary treatments. | Provide additional documentation if requested. |
Next Steps After Approval:
- Carefully read all conditions on the approval notice.
- Liaise with your architect or builder to ensure all stipulations are met.
- If unsure about any condition, contact your local planning officer for clarification.
- Keep documentation and correspondence for future reference, especially for selling your home later on.
If Your Application is Refused
A refusal isn’t necessarily the end of the road. The decision notice will outline specific reasons for refusal, which can help guide your next steps.
Your Options Following Refusal
| Option | Description | Recommended Action |
|---|---|---|
| Revise and Resubmit | Amend your proposal to address the issues raised by the council. | Work with a planning consultant or architect; resubmit after modifications. |
| Lodge an Appeal | If you believe the refusal was unjustified, you can appeal to the Planning Inspectorate within 12 weeks (for householder applications). | Prepare supporting evidence; consider professional advice before submitting an appeal online via the Planning Inspectorate website. |
| Seek Pre-Application Advice | The council’s planning team can offer informal guidance on how to improve your chances next time. | Book a pre-application meeting and discuss alternative solutions. |
The Appeals Process Explained:
- You must submit your appeal within the stated deadline (usually 12 weeks for householders).
- The Planning Inspectorate will review written representations from both you and the local authority.
- A site visit may be arranged, after which a final decision will be issued—this process typically takes several months.
- If successful, you may proceed with your revised extension plans. If not, further revisions or alternative approaches may be necessary.
Whether approved or refused, responding promptly and thoroughly at this stage ensures that your house extension project in the UK moves forward as smoothly as possible. Always keep communication lines open with local authorities and seek professional guidance where needed to avoid costly delays or complications down the line.